Often rooms have to be monitored from the outside due to no direct access and the observation has to be effected by systems hardly to detect. For this purpose the PKI 3200 Infrared Observation System offers the right choice. Due to its infrared light – which is completely invisible to human eyes and beyond the range of any RF scanner or radio receiver – this Infrared Observation System perfectly meets all requirements.
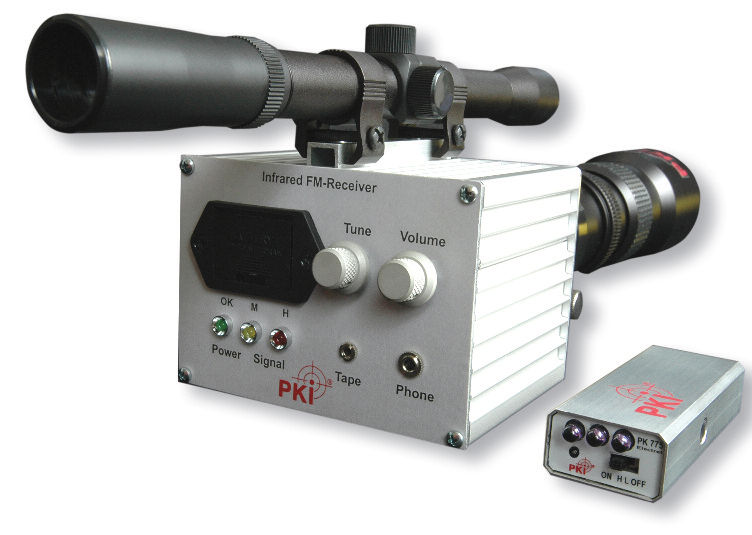
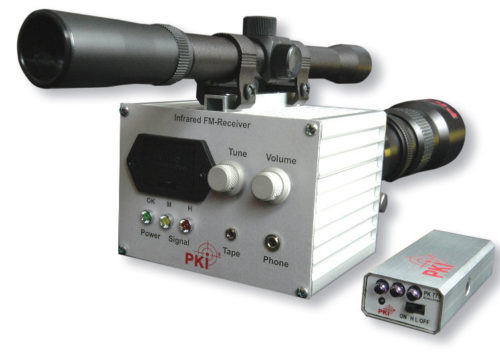
The system consists of an optical receiver with pinpointed telescope, a tripod for mounting the receiver and a transmitter for room observation. The transmitter is featuring a contact microphone which operates like a stethoscope to listen through walls, windows etc. The receiver is equipped with a tele-lens which allows looking into rooms from a distance of approx. 300 meters.
Specifications
Transmitter Frequency 870nm IR
• Carrier frequency: standard 125KHz
• Modulation: NFM F 3
• Deviation: 5KHz
• Output power: approx. 40m
• Stethoscope-transmitter dimensions: 45 x 35 x 15mm, battery 6V
• Room-transmitter dimensions: 85 x 35 x 20mm, block battery 9V
Receiver Lens connector M 42
• Receiving principle superhet
• Dimension: 500 x 120mm incl. lens and telescope sight
• Power 9V block battery
• Modulation
• Low rate of detection
• Monitoring of inaccessible rooms through walls and windows
• Portable system
• Easy installation
Operating Manual
The PKI 3200 Infrared Observation System consists of a Piezo sensor, an optical receiver mounted on supplied tripod and a high power transmitter with 50 mW output power operating in 870nm IR range which is invisible for human eyes. At any time of use of the PKI 3200 Infrared Observation System there has to be a “line-in-sight” connection between transmitter and receiver. By means of the stethoscope the sound-waves are taken from solid materials. Therefore the stethoscope transmitter has to be placed to windows, door or walls with mastic material. Using the Piezo sensor at window-panes is quite uncomplicated. Just double-sheet glasses may induce to place the transmitter at the window-frame instead of the window-glass itself.
Installation and operation of transmitter
1) Insert battery in transmitter by opening battery compartment and place 9V block battery
2) Place the piezo sensor Ø30 x 18mm which is built in a small round housing with mastic material to a window pane, wall etc. The quantity of the mastic material depends on surface structure. Glass – with its very plain surface – only needs a small quantity, while walls have a rough surface and need more of this material. Sound-capacities will be influenced by the quantity of mastic material being used:
– less mastic material will make the sound high and pitch
– more mastic material will make the sound dump and low
3) Place transmitter at best possible position. Installation can be done within 50cm from Piezo sensor.
4) Switch on transmitter
Installation and operation of receiver
1) Insert battery by opening battery compartment and place 9V block battery to right polarity.
2) Switch on the receiver and align receiver to transmitter. The green LED indicates that a transmitting signal is low and red LED shows the highest possible signal-strength of this. When the red LED shines fine tuning can be done by “tune” switch. The “volume” switch is for audio signal to headphone. The receiver is fitted with a thread suitable for mounting to the supplied tripod. On top of the receiver an aiming device is mounted for the visual alignment between receiver and transmitter in case of longer distances. After the receiver is fixed on the tripod, a headset is connected to the relevant “phone” socket and the receiving unit is switched on – the alignment to the transmitter can take place.
By use of the aiming-device rough, optical alignment is possible. If there is no signal being clearly received after the first alignment, slowly turn the receiver or move the tripod slowly and carefully till the signal is bright and clear. Hold the tripod in this position and fix it. By the use of the turning-button “tune” at the backside of the receiver, a sharp tuning to the transmitting frequency can be achieved. The focussing-ring at the objective (sharpness-control) is used for adjustment of the best possible signal-to-noiseratio. The diaphragm of the objective normally should be opened to maximum. Only under bright sunlight conditions a partly closing of the diaphragm might be recommended for the improvement of signal-reception.The socket “tape” at the back-side of receiver is provided for the connection of a recording unit.

